Project 2: Lighting translucency CG Object through Composite
- Saw Htoo
- Jan 28, 2024
- 1 min read

Updated: Apr 7, 2024
PART A: Camera Tracking
1/28
image test - these are images used to test the camera and find the location for the project.


This was the final location and image set I planned for the project. The weather was problematic the day I took the photo, it was cloudy and there were multiple attempts to get consistent lighting.

For the photos of the chrome ball, I took images in Photoshop and turned them into HDR


1/30
I didn't have enough footage for the First set, so I reshot with what's available.
New set and reference:


I took the footage and tracked it in Nuke. There were other videos but the lowest amount of error I could get was 0.9 and it was with this video.
Over the weekend, I retracted and got a better result of 0.66

I exported the footage and imported it in Maya, and then I moved the camera to have the floor lay flat. I playblast it to see how it looks.

The camera movement was perfect so I aligned the camera to the gride and keyframe the part where you see the object move.
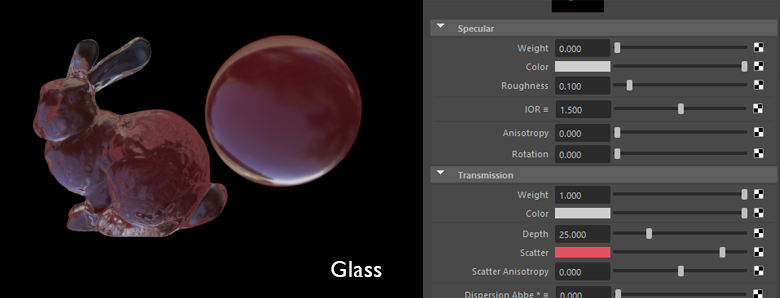
PART B: Customized Elements
2/6
After getting the camera movement to line up, I set up layers of different types of texture for the Object.
2/11 (Updated)


Comments